「Engineering」カテゴリーアーカイブ

wordpressのインストール

お使いのサーバーの PHP では WordPress に必要な MySQL 拡張を利用できないようです。

との表示。なんのことはなく、MySQLが落ちていたので起動。

[root@ol init.d]# ./mysqld start

MySQL データベースを初期化中:  WARNING: The host ‘ol.daimlars.jp’ could not be looked up with resolveip.

This probably means that your libc libraries are not 100 % compatible

with this binary MySQL version. The MySQL daemon, mysqld, should work

normally with the exception that host name resolving will not work.

This means that you should use IP addresses instead of hostnames

when specifying MySQL privileges !

Installing MySQL system tables…

OK

Filling help tables…

OK

To start mysqld at boot time you have to copy

support-files/mysql.server to the right place for your system

PLEASE REMEMBER TO SET A PASSWORD FOR THE MySQL root USER !

To do so, start the server, then issue the following commands:

/usr/bin/mysqladmin -u root password ‘new-password’

/usr/bin/mysqladmin -u root -h ol.daimlars.jp password ‘new-password’

Alternatively you can run:

/usr/bin/mysql_secure_installation

which will also give you the option of removing the test

databases and anonymous user created by default.  This is

strongly recommended for production servers.

See the manual for more instructions.

You can start the MySQL daemon with:

cd /usr ; /usr/bin/mysqld_safe &

You can test the MySQL daemon with mysql-test-run.pl

cd /usr/mysql-test ; perl mysql-test-run.pl

Please report any problems with the /usr/bin/mysqlbug script!

                                                           [  OK  ]

mysqld を起動中:                                           [  OK  ]


Warningが出たのでhostsにホスト名を追加。で、MySQLを再起動しても状況変わらず。

今度はApacheを再起動したらエラー

httpd を起動中: httpd: Could not reliably determine the server’s fully qualified domain name, using ol.daimlars.jp for ServerName

基本に戻って1つずつ確認。まずはphp.iniの設定。

続いて、phpmysqlのインストール

[root@ol wordpress]# yum install phpmysql

読み込んだプラグイン:refresh-packagekit, security

インストール処理の設定をしています

public_ol6_UEKR3_latest                                  | 1.2 kB     00:00     

public_ol6_latest                                        | 1.4 kB     00:00     

依存性の解決をしています

–> トランザクションの確認を実行しています。

—> Package phpmysql.x86_64 0:5.3.3-40.el6_6 will be インストール

–> 依存性の処理をしています: php-common(x86-64) = 5.3.3-40.el6_6 のパッケージ: phpmysql-5.3.3-40.el6_6.x86_64

–> トランザクションの確認を実行しています。

—> Package php-common.x86_64 0:5.3.3-27.el6_5 will be 更新

–> 依存性の処理をしています: php-common(x86-64) = 5.3.3-27.el6_5 のパッケージ: php-gd-5.3.3-27.el6_5.x86_64

–> 依存性の処理をしています: php-common(x86-64) = 5.3.3-27.el6_5 のパッケージ: php-5.3.3-27.el6_5.x86_64

–> 依存性の処理をしています: php-common(x86-64) = 5.3.3-27.el6_5 のパッケージ: phpxml-5.3.3-27.el6_5.x86_64

–> 依存性の処理をしています: php-common(x86-64) = 5.3.3-27.el6_5 のパッケージ: php-pdo-5.3.3-27.el6_5.x86_64

–> 依存性の処理をしています: php-common(x86-64) = 5.3.3-27.el6_5 のパッケージ: phpcli-5.3.3-27.el6_5.x86_64

—> Package php-common.x86_64 0:5.3.3-40.el6_6 will be an update

–> トランザクションの確認を実行しています。

—> Package php.x86_64 0:5.3.3-27.el6_5 will be 更新

—> Package php.x86_64 0:5.3.3-40.el6_6 will be an update

—> Package phpcli.x86_64 0:5.3.3-27.el6_5 will be 更新

—> Package phpcli.x86_64 0:5.3.3-40.el6_6 will be an update

—> Package php-gd.x86_64 0:5.3.3-27.el6_5 will be 更新

—> Package php-gd.x86_64 0:5.3.3-40.el6_6 will be an update

—> Package php-pdo.x86_64 0:5.3.3-27.el6_5 will be 更新

—> Package php-pdo.x86_64 0:5.3.3-40.el6_6 will be an update

—> Package phpxml.x86_64 0:5.3.3-27.el6_5 will be 更新

—> Package phpxml.x86_64 0:5.3.3-40.el6_6 will be an update

–> 依存性解決を終了しました。

依存性を解決しました

================================================================================

パッケージ      アーキテクチャ

                             バージョン            リポジトリー            容量

================================================================================

インストールしています:

phpmysql       x86_64      5.3.3-40.el6_6        public_ol6_latest       84 k

依存性関連での更新をします。:

php             x86_64      5.3.3-40.el6_6        public_ol6_latest      1.1 M

phpcli         x86_64      5.3.3-40.el6_6        public_ol6_latest      2.2 M

php-common      x86_64      5.3.3-40.el6_6        public_ol6_latest      527 k

php-gd          x86_64      5.3.3-40.el6_6        public_ol6_latest      109 k

php-pdo         x86_64      5.3.3-40.el6_6        public_ol6_latest       77 k

phpxml         x86_64      5.3.3-40.el6_6        public_ol6_latest      105 k

トランザクションの要約

================================================================================

インストール         1 パッケージ

アップグレード       6 パッケージ

総ダウンロード容量: 4.2 M

これでいいですか? [y/N]y

パッケージをダウンロードしています:

(1/7): php-5.3.3-40.el6_6.x86_64.rpm                     | 1.1 MB     00:01     

(2/7): phpcli-5.3.3-40.el6_6.x86_64.rpm                 | 2.2 MB     00:01     

(3/7): php-common-5.3.3-40.el6_6.x86_64.rpm              | 527 kB     00:00     

(4/7): php-gd-5.3.3-40.el6_6.x86_64.rpm                  | 109 kB     00:00     

(5/7): phpmysql-5.3.3-40.el6_6.x86_64.rpm               |  84 kB     00:00     

(6/7): php-pdo-5.3.3-40.el6_6.x86_64.rpm                 |  77 kB     00:00     

(7/7): phpxml-5.3.3-40.el6_6.x86_64.rpm                 | 105 kB     00:00     

——————————————————————————–

合計                                            739 kB/s | 4.2 MB     00:05     

rpm_check_debug を実行しています

トランザクションのテストを実行しています

トランザクションのテストを成功しました

トランザクションを実行しています

  更新                    : php-common-5.3.3-40.el6_6.x86_64               1/13

  更新                    : php-pdo-5.3.3-40.el6_6.x86_64                  2/13

  更新                    : phpcli-5.3.3-40.el6_6.x86_64                  3/13

  更新                    : php-5.3.3-40.el6_6.x86_64                      4/13

  インストールしています  : phpmysql-5.3.3-40.el6_6.x86_64                5/13

  更新                    : phpxml-5.3.3-40.el6_6.x86_64                  6/13

  更新                    : php-gd-5.3.3-40.el6_6.x86_64                   7/13

  整理中                  : php-5.3.3-27.el6_5.x86_64                      8/13

  整理中                  : phpcli-5.3.3-27.el6_5.x86_64                  9/13

  整理中                  : php-gd-5.3.3-27.el6_5.x86_64                  10/13

  整理中                  : phpxml-5.3.3-27.el6_5.x86_64                 11/13

  整理中                  : php-pdo-5.3.3-27.el6_5.x86_64                 12/13

  整理中                  : php-common-5.3.3-27.el6_5.x86_64              13/13

  Verifying               : php-pdo-5.3.3-40.el6_6.x86_64                  1/13

  Verifying               : phpmysql-5.3.3-40.el6_6.x86_64                2/13

  Verifying               : phpxml-5.3.3-40.el6_6.x86_64                  3/13

  Verifying               : phpcli-5.3.3-40.el6_6.x86_64                  4/13

  Verifying               : php-5.3.3-40.el6_6.x86_64                      5/13

  Verifying               : php-gd-5.3.3-40.el6_6.x86_64                   6/13

  Verifying               : php-common-5.3.3-40.el6_6.x86_64               7/13

  Verifying               : phpxml-5.3.3-27.el6_5.x86_64                  8/13

  Verifying               : phpcli-5.3.3-27.el6_5.x86_64                  9/13

  Verifying               : php-5.3.3-27.el6_5.x86_64                     10/13

  Verifying               : php-gd-5.3.3-27.el6_5.x86_64                  11/13

  Verifying               : php-common-5.3.3-27.el6_5.x86_64              12/13

  Verifying               : php-pdo-5.3.3-27.el6_5.x86_64                 13/13

インストール:

  phpmysql.x86_64 0:5.3.3-40.el6_6                                             

依存性を更新しました:

  php.x86_64 0:5.3.3-40.el6_6              phpcli.x86_64 0:5.3.3-40.el6_6      

  php-common.x86_64 0:5.3.3-40.el6_6       php-gd.x86_64 0:5.3.3-40.el6_6       

  php-pdo.x86_64 0:5.3.3-40.el6_6          phpxml.x86_64 0:5.3.3-40.el6_6      

完了しました!

[root@ol wordpress]#


続いて、MySQLにユーザ作成。

[root@ol wordpress]# mysql -u root -p

Enter password:

Welcome to the MySQL monitor.  Commands end with ; or \g.

Your MySQL connection id is 2

Server version: 5.1.73 Source distribution

Copyright (c) 2000, 2013, Oracle and/or its affiliates. All rights reserved.

Oracle is a registered trademark of Oracle Corporation and/or its

affiliates. Other names may be trademarks of their respective

owners.

Type ‘help;’ or ‘\h’ for help. Type ‘\c’ to clear the current input statement.

mysql> create database wordpress;

Query OK, 1 row affected (0.00 sec)

mysql> grant all privileges on wp.* to wp@localhost identified by ‘*********’;

Query OK, 0 rows affected (0.00 sec)
MySQLインストール

brewさん強力です。瞬殺で終了

lion:apache2 jun$ brew install mysql

Warning: Your Xcode (4.6) is outdated

Please install Xcode 4.6.1.

Warning: It appears you have MacPorts or Fink installed.

Software installed with other package managers causes known problems for

Homebrew. If a formula fails to build, uninstall MacPorts/Fink and try again.

==> Downloading https://downloads.sf.net/project/machomebrew/Bottles/mysql-5.6.1

######################################################################## 100.0%

==> Pouring mysql-5.6.10.mountain_lion.bottle.tar.gz

==> Caveats

Set up databases to run AS YOUR USER ACCOUNT with:

unset TMPDIR

mysql_install_db –verbose –user=`whoami` –basedir=”$(brew –prefix mysql)” –datadir=/usr/local/var/mysql –tmpdir=/tmp

To set up base tables in another folder, or use a different user to run

mysqld, view the help for mysql_install_db:

mysql_install_db –help

and view the MySQL documentation:

* http://dev.mysql.com/doc/refman/5.5/en/mysql-install-db.html

* http://dev.mysql.com/doc/refman/5.5/en/default-privileges.html


To run as, for instance, user “mysql“, you may need to `sudo`:

sudo mysql_install_db …options…

A “/etc/my.cnf” from another install may interfere with a Homebrew-built

server starting up correctly.

To connect:

mysql -uroot

To have launchd start mysql at login:

ln -sfv /usr/local/opt/mysql/*.plist ~/Library/LaunchAgents

Then to load mysql now:

launchctl load ~/Library/LaunchAgents/homebrew.mxcl.mysql.plist

Or, if you don’t want/need launchctl, you can just run:

mysql.server start

==> Summary

🍺 /usr/local/Cellar/mysql/5.6.10: 9244 files, 351M

lion:apache2 jun$

Mac OS X Lion Server①brewインストール

久々更新。homebrewをインストールしてみた。オフィシャルはここ。

http://mxcl.github.com/homebrew/

インストールは以下で終了。ただ、Macにまだ慣れないので今ひとつわからない。。。

ruby -e “$(curl -fsSkL raw.github.com/mxcl/homebrew/go)”

Don’t run this as root!

bash-3.2# exit

exit

lion:apache2 jun$ ruby -e “$(curl -fsSkL raw.github.com/mxcl/homebrew/go)”

==> This script will install:

/usr/local/bin/brew

/usr/local/Library/…

/usr/local/share/man/man1/brew.1

Press ENTER to continue or any other key to abort

==> /usr/bin/sudo /bin/mkdir /usr/local

==> /usr/bin/sudo /bin/chmod g+rwx /usr/local

==> /usr/bin/sudo /usr/bin/chgrp admin /usr/local

==> Downloading and Installing Homebrew…

remote: Counting objects: 106921, done.

remote: Compressing objects: 100% (44546/44546), done.

remote: Total 106921 (delta 75965), reused 89557 (delta 61470)

Receiving objects: 100% (106921/106921), 16.02 MiB | 796 KiB/s, done.

Resolving deltas: 100% (75965/75965), done.

From https://github.com/mxcl/homebrew

* [new branch] master -> origin/master

HEAD is now at 6238a2b fann and wxmaxima: are now in homebrew/science

Warning: Install the “Command Line Tools for Xcode“: http://connect.apple.com

==> Installation successful!

You should run `brew doctor’ *before* you install anything.

Now type: brew help

lion:apache2 jun$

Wariningが出ているがひとまず気にせず進める。


Mountain Lion+Virtual Boxもろもろ

久々の更新。滞ってたなぁ。

正月構築のメモ。

Mountain Lion(Mac Mini 2011 Mid)へのファイル転送がやけに遅いと思ったら100Mbpsでリンクアップしてた。原因は

どうもケーブルでCate6に変更したら無事にギガでリンクアップ。良かった。転送速度も7MB/s→50MB/sにアップ。

Windowsでの転送が60MB/sなんでファイルシステムの変換が入ることも踏まえると妥当かな。

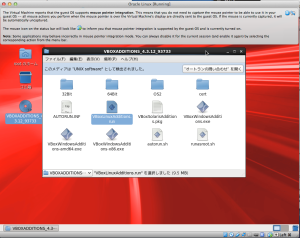
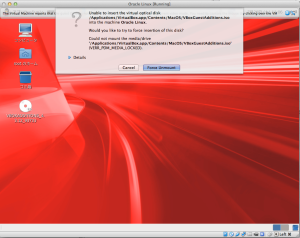
であと、半年くらい放置していたOracle Linux1もアップデート。まずは以下を参考にしてGuest Additionまでインストール完了。

http://www.oraclenerd.com/2011/03/oel-6-virtualbox-guest-additions.html

久々に触るとかなり忘れてること、進化していることに気がつきます>Linux

やっぱり手は動かしてなんぼだね。


でもって、Macで更新した場合に、windowsだとALT+半角で聞いていたキーが聞かない。行間の狭い改行ってどうやるんだろうか。

おうちサーバ更改案

うーん。

HDDのみ交換 Segate Barracuda 3TB → 13,000円程度✕2=26,000

Atomで再構成

マザー: 7,000

RAIDカード: 5,000

メモリ:4,000

windows home server2011: 6,000

ディスク:26,000

ACアダプタ: 10,000

→ 58,000

MacMini 52,800

メモリは手動で増設:8,000

ディスク(1TB):20,000

結局欲しいのはデータバックアップのディスクなんだよね。しかも、デジカメ+DV+iTunes

もともとサーバがあるところのバックアップだから冗長化も実は不要だしOSも問わないよな。。。

twitterまとめ2012/12/①

やりたいと思ったことは、おおよそ、準備されている世の中。twitterでリツイートしている情報を整理しておきたくて、wordpress.comブログでできないものかと思ったら、やはりあった「Blackbird Pieをwordpress.comで使う方法」。今後はtwitter digestカテゴリーとして整理しておきます。ということで。

http://twitter.com/#!/publickey/status/148419812396244993

コードレビューをしなくて、テストで不備を見つけようとするSIerの姿勢そのものが無理がある。だから、サラリーマン・プログラマーでも仕事にありつけるんだろうね。下記は特に納得。

より高頻度にバグを修正し、かつ最近になって集中的に直しているほど、スコアが大きくなります

http://twitter.com/#!/ryoasai74/status/148340249557348352

それを解決したのが、仮想通貨とケータイ払いの組み合わせです。これが、どちらか一つでは駄目で、両方組み合わさることによって強力な集金システムになります。その理由は2点。「欲求から実現への距離」と「消費と仮想化された消費の距離」です。

(中略)

銀行振り込みやクレジットカード払いが上手く行かない理由は、欲求の衝動でお金を払おうとした利用者の目の前に高いハードルを置いて、越えてみろと言っているようなものだからです。

以前、参加したセミナーでも確かにそういう意見はあったけれども、やはりクレジットカード払いの敷居がナゼ高くて、ケータイ払いは低いのか・・・。端的に信用の問題だろうが、ここにヒントがある気がする。となると、やはりスマホ時代の決済システムには、まだ商機が残されている気がする。

http://twitter.com/#!/takoratta/status/147558360571580417

前述のtweetを見て、商機がと書いたもののすぐに無くなる予感。今こそGoogleと提携か!?ただ、Googleが5%をもらったら、決済サービス会社の入る余地なし。

http://twitter.com/#!/muraken720/status/145899700212596737

javascript一本で、クライアントからサーバまで書けるのは、気持ちがよいです。

これは強烈。。。

http://twitter.com/#!/maruyama097/status/145086202616360961

JavaSE8は2013年ですか、了解です。こっちにはJ2EEの予定ですね。ただ、1ユーザとしてはVMの選択も悩ましいので、その点の情報も欲しい。OpenJDKがよく分からんし。

いじょう。

iTunesで再生チャートランキングを定期的に自動で作りたい(1)

まずは環境作りから・・・。

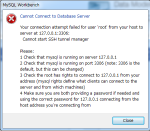
MySQLインストールでは以下にはまった。「Cannot start SSH tunnel manager」


Home>View>Outputよりログを参照すると同様のメッセージが多発。

ImportError: DLL load failed: �w�肳�ꂽ���W���[�������‚���܂���B

Traceback (most recent call last):

File “C:\Program Files (x86)\MySQL\MySQL Workbench 5.2 CE\sshtunnel.py”, line 6, in

import socket

File “C:\Program Files (x86)\MySQL\MySQL Workbench 5.2 CE\Python\socket.py”, line 46, in

import _socket

Tracはインストールしてなかったが、Pythonhome環境変数をセットしてみた。

Traceback (most recent call last):

File “C:\Program Files (x86)\MySQL\MySQL Workbench 5.2 CE\sshtunnel.py”, line 6, in <module>

import socket

File “C:\Program Files (x86)\MySQL\MySQL Workbench 5.2 CE\Python\socket.py”, line 46, in <module>

import _socket

ImportError: DLL load failed: �w�肳�ꂽ���W���[�������‚���܂���B¥

断念。。。

ただ、DataModelingは使えたのでER図を書いてDDLを自動生成してテーブルを作る。


DDLはテーブルを選んで右クリックで自動生成。ついで、EclipseJPAプロジェクトを作成し、右クリック>新規作成>エンティティでエンティティを作成。こんなクラスができた。

import java.io.Serializable;

import javax.persistence.*;

import java.util.Date;

import java.util.Set;

/**

* The persistent class for the tbl_update database table.

*

*/

@Entity

@Table(name=”tbl_update”)

public class TblUpdate implements Serializable {

private static final long serialVersionUID = 1L;

@Id

@Column(name=”Trac_ID”)

private int trac_ID;

@Column(name=”Play_Count”)

private String play_Count;

@Column(name=”Type”)

private String type;

@Temporal( TemporalType.TIMESTAMP)

@Column(name=”Update_data”)

private Date update_data;

//bi-directional many-to-one association to TbmTrack

@OneToMany(mappedBy=”tblUpdate”)

private Set<TbmTrack> tbmTracks;

public TblUpdate() {

}

public int getTrac_ID() {

return this.trac_ID;

}

public void setTrac_ID(int trac_ID) {

this.trac_ID = trac_ID;

}

public String getPlay_Count() {

return this.play_Count;

}

public void setPlay_Count(String play_Count) {

this.play_Count = play_Count;

}

public String getType() {

return this.type;

}

public void setType(String type) {

this.type = type;

}

public Date getUpdate_data() {

return this.update_data;

}

public void setUpdate_data(Date update_data) {

this.update_data = update_data;

}

public Set<TbmTrack> getTbmTracks() {

return this.tbmTracks;

}

public void setTbmTracks(Set<TbmTrack> tbmTracks) {

this.tbmTracks = tbmTracks;

}

}

クラスの自動生成とともに、persistence.xmlも更新されている!

<?xml version=”1.0″ encoding=”UTF-8“?>

<persistence version=”2.0″ xmlns=”http://java.sun.com/xml/ns/persistence” xmlns:xsi=”http://www.w3.org/2001/XMLSchema-instance” xsi:schemaLocation=”http://java.sun.com/xml/ns/persistence http://java.sun.com/xml/ns/persistence/persistence_2_0.xsd“>

<persistence-unit name=”JPA_test”>

<class>TblUpdate</class>

<class>TbmTrack</class>

</persistence-unit>

</persistence>

DBへの登録は下記のようなクラスで可能。

import javax.persistence.EntityManager;

import javax.persistence.EntityManagerFactory;

import javax.persistence.EntityTransaction;

import javax.persistence.Persistence;

public class test {

public static void main(String[] args) {

TbmTrack track = new TbmTrack();

EntityManagerFactory emf = Persistence.createEntityManagerFactory(“JPA_test”);

EntityManager em = emf.createEntityManager();

track.setTrack_id(1);

track.setArtist(new String(“test”));

EntityTransaction tx = em.getTransaction();

tx.begin();

em.persist(track);

tx.commit();

em.close();

emf.close();

}

}

予想通りDBからDDLを抽出してしまえば、残るソースで書くのはほんと僅か。これじゃあ言語毎の生産性も違いはあまりでない気がする。

iTunesXMLファイルからは真・plist形式のxml読み込み用digester-rules(およびクラス)があったので、ここから拝借して秒殺。

面倒なのは前回のダンプとの差分をとってチャートを出したりする、データの持ち方の設計あたり。

簡単に作れるフレームワークが無いものか。

PS3 Media Server

我が家のWindows Home Serverにインストール。

Sonyのハンディカムで撮ったAVCHDのビデオを再生したく色々と試した見た結論。

・単純にDVDに焼いてしまうと”当然”画質は落ちる。というか、見て明らかに分るくらい画質が落ちる。(エンコードにはPMBを使用)

windows home serverDLNAでは当然AVCHDは共有不可(だって、DLNA対応フォーマットじゃないし)

PS3 Media Server配下にビデオを置いてみた。けど、m2tsを再生しようとすると「データが壊れています」なぜ・・・。でも#Encoding配下のNo Encodingでは見られる。

・PMBをバージョンアップして、m2tsを結合したところ、見られるようになった。

・結論。PMB?のバグかなんかで、ファイルフォーマットが壊れていたっぽい。

晴れて解決。これで自分大好きな娘の要求通りに好きな時にビデオが見られる。